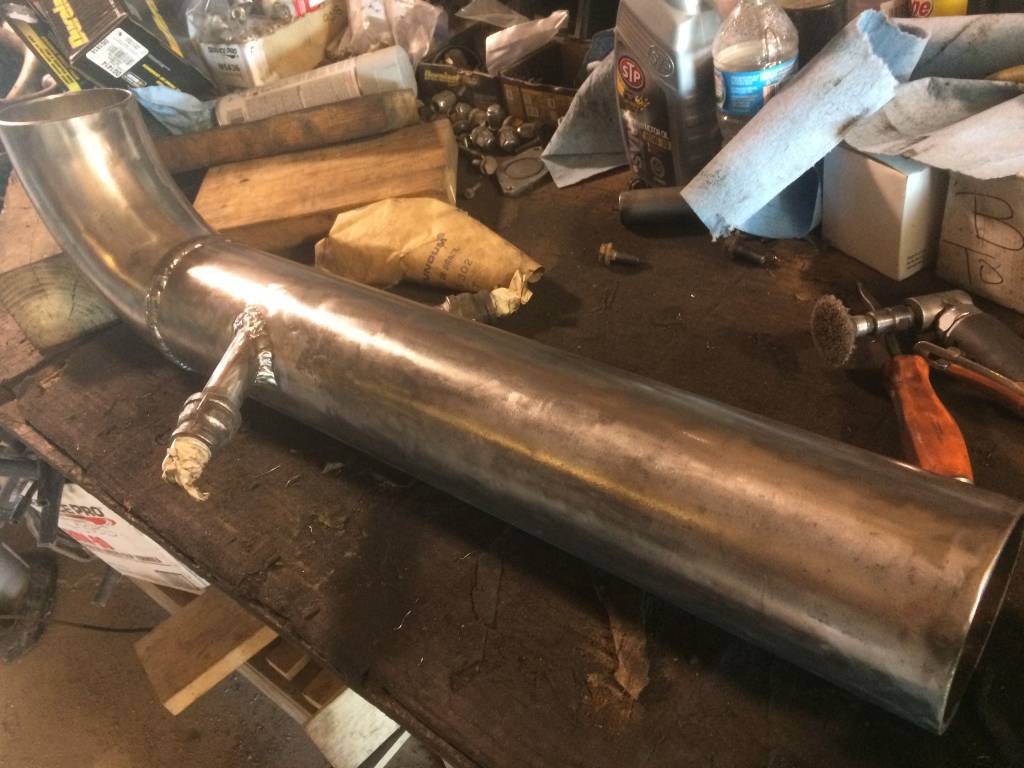
Since this is all going to be buried underground. I prepped the metal to help keep it from rusting out. First off, I cleaned off all the original paint and surface rust that was on the final metal pipe and elbow. Just used a combination of sandpaper, wire wheel, and abrasive pads.
When that was done, I cleaned it off with some brake clean and sprayed the whole thing with good rust prohibitive to help protect it.
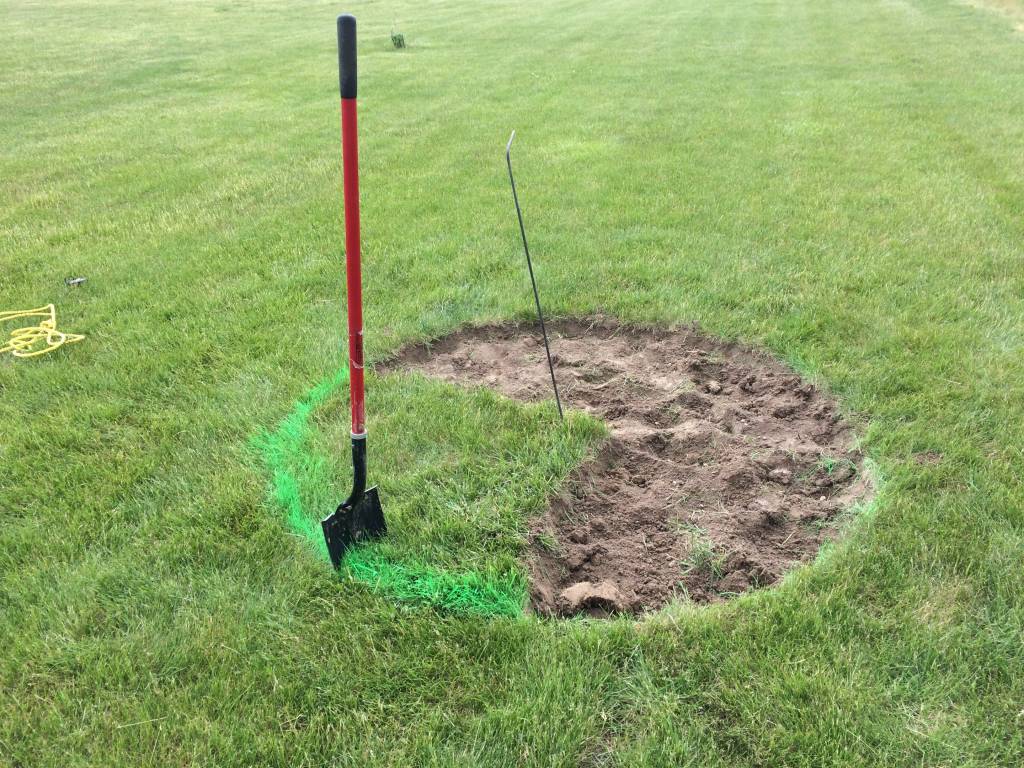
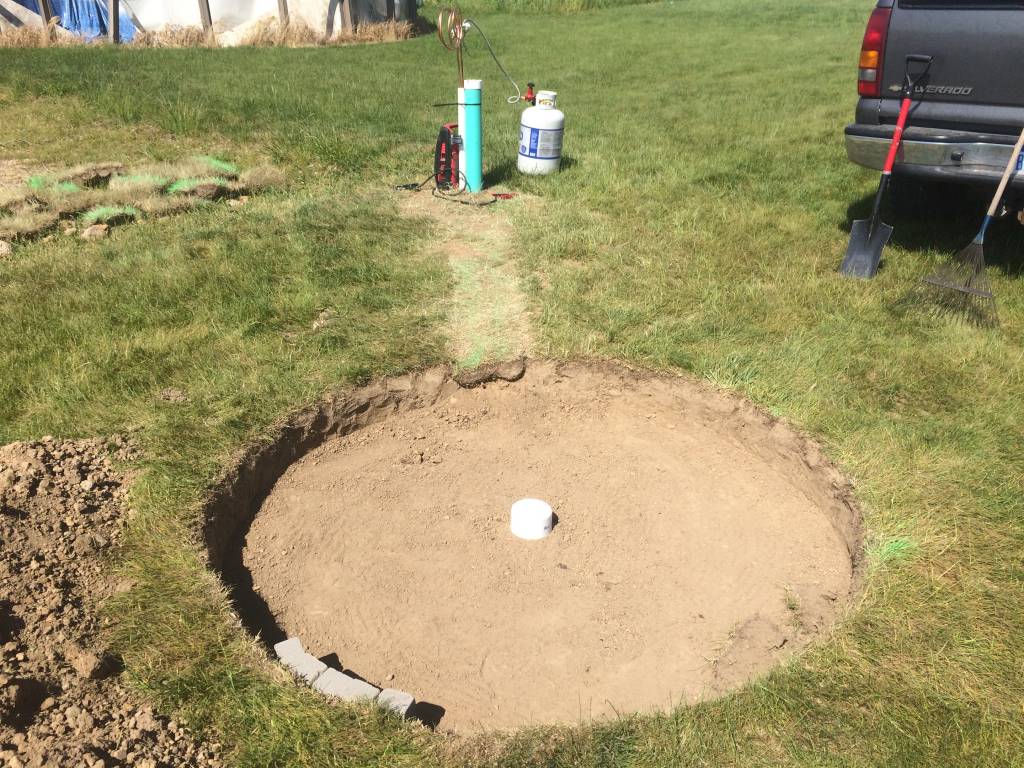
Now it was time to make the pit itself. After deciding where I wanted to put it, I poked a rod into the ground where i wanted center to be and took a piece of rope and tied it to it. Marked on the piece of rope the radius I waned the pit to be and took a can of marking spray and used the road as a guide to mark on the ground where to dig.
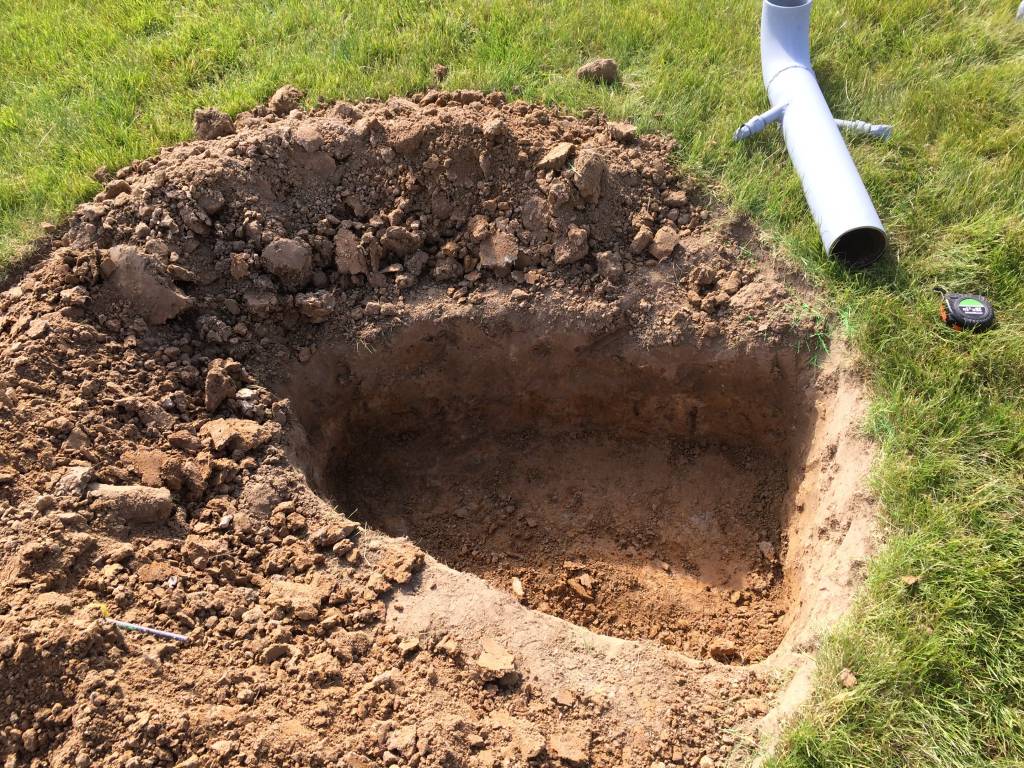
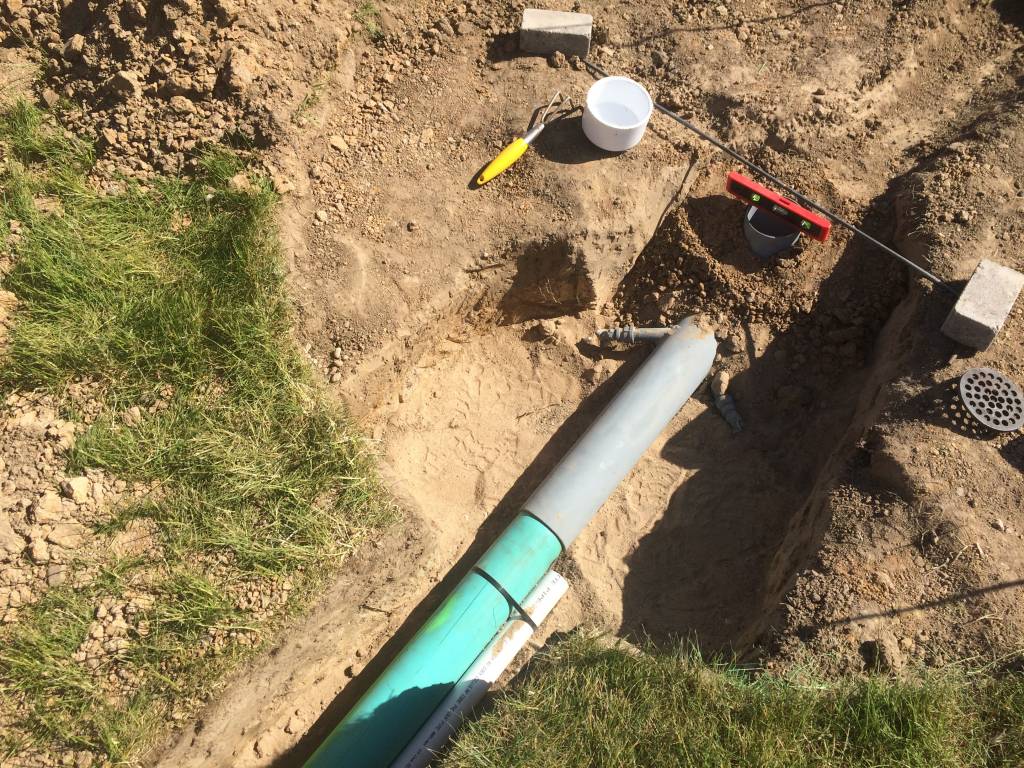
The next thing to do now was to dig a deeper hole for where the pip was going to be. This had to be deep enough so that the top of the elbow would be at the same level as the bottom of the pit would be.
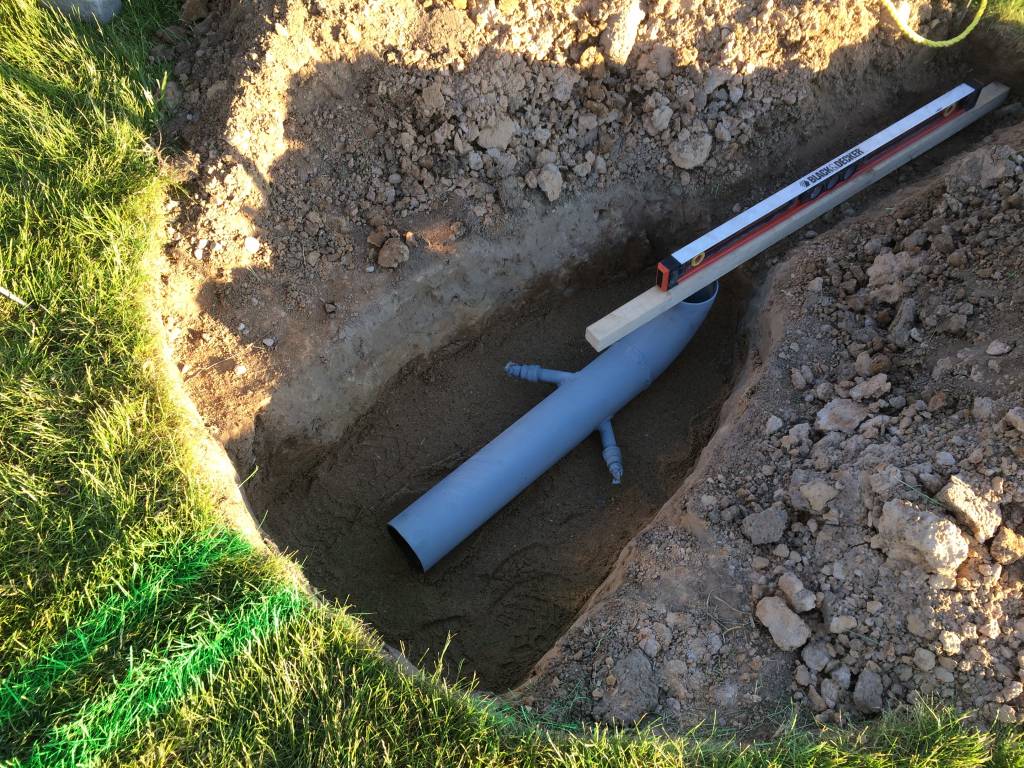
So to figure all that out. I dug a small trench to the opposite side of the pit and dug down to the depth I wanted it to be at. Laid a piece of wood from there to the top of the pipe laying in place, and adjusted it until the pipe was level.
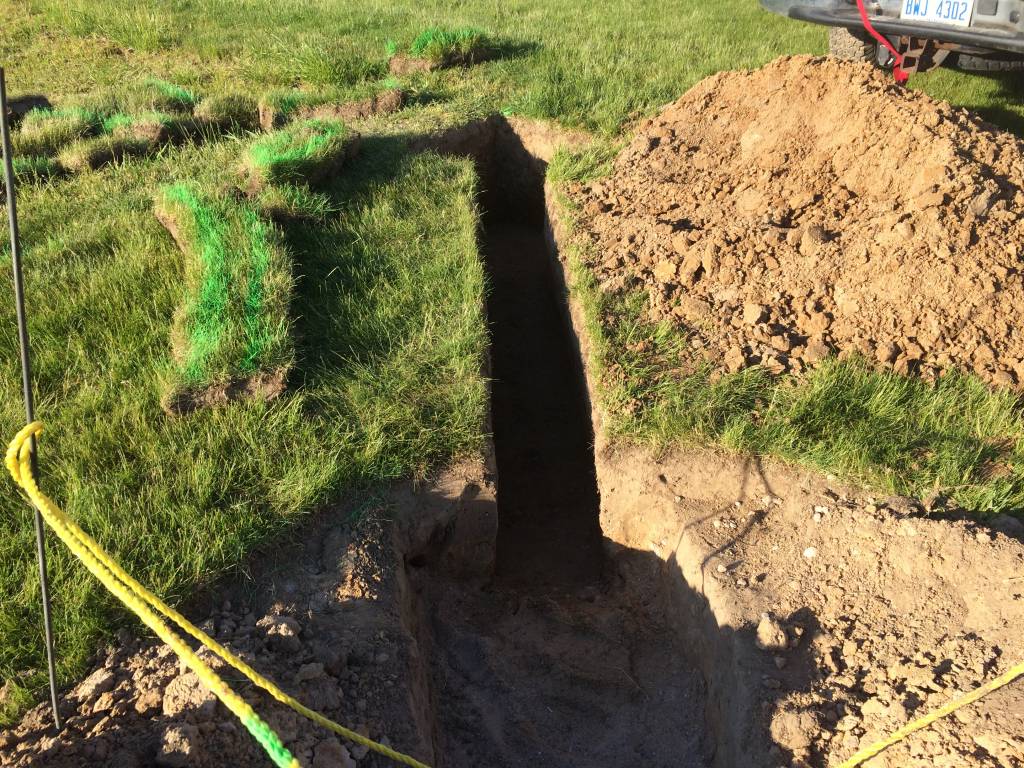
The next thing to do now as to dig the trench for the rest of the pipes that was to feed it. This was dug a little deeper then needed to be and then leveled out with sand. This was for two reasons. 1, its easier to level, and 2, allow for some water drainage.
Once it was dug, the pipes were fitted in the trench. Keeping and eye on things making sure everything stayed level.
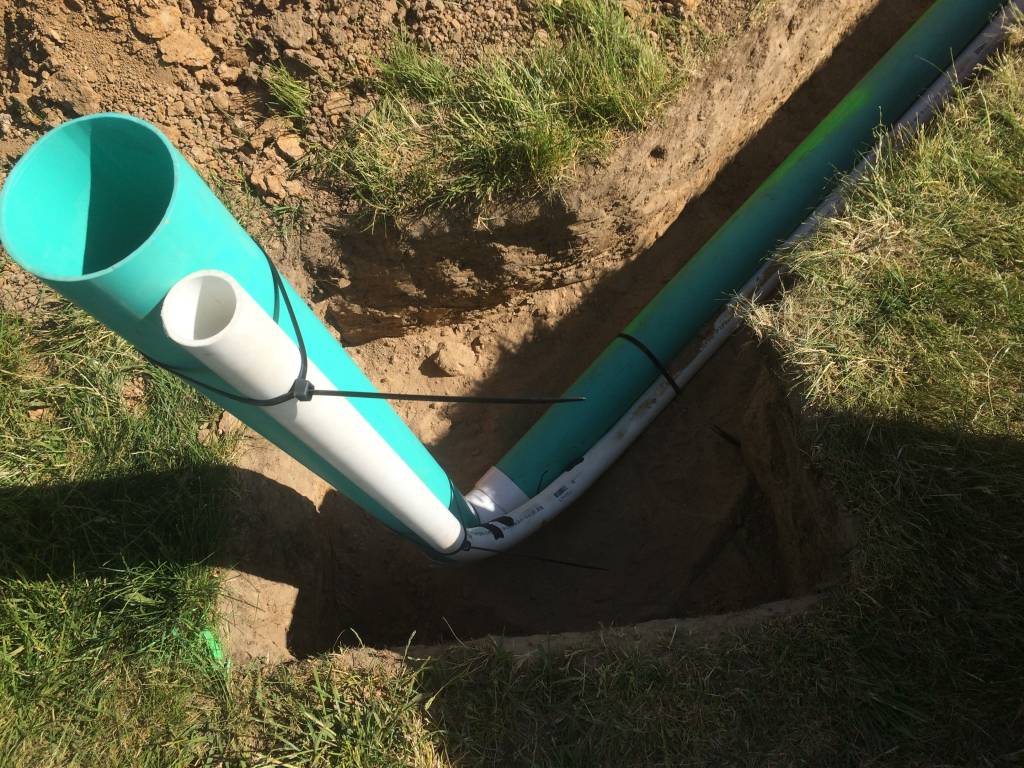
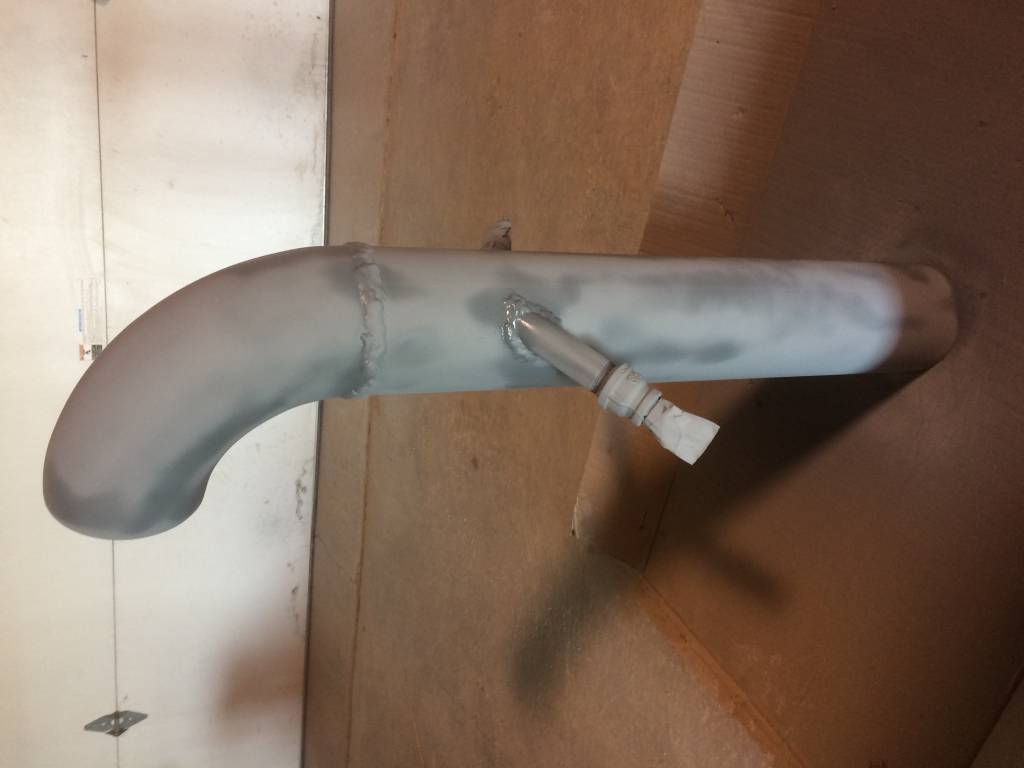
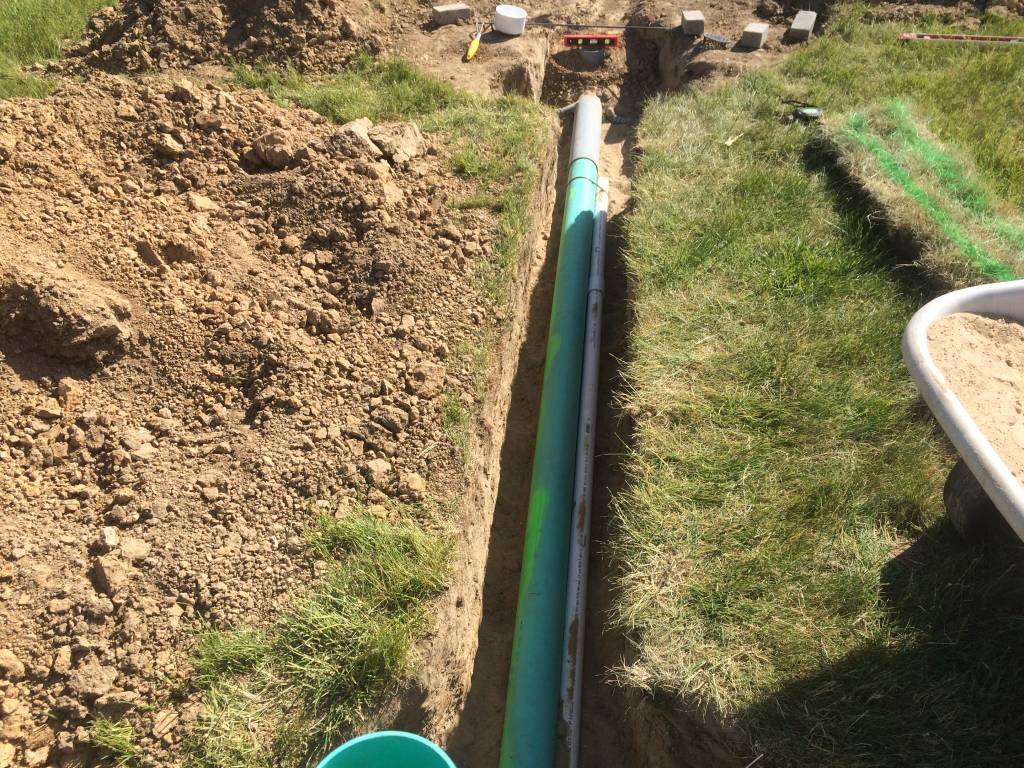
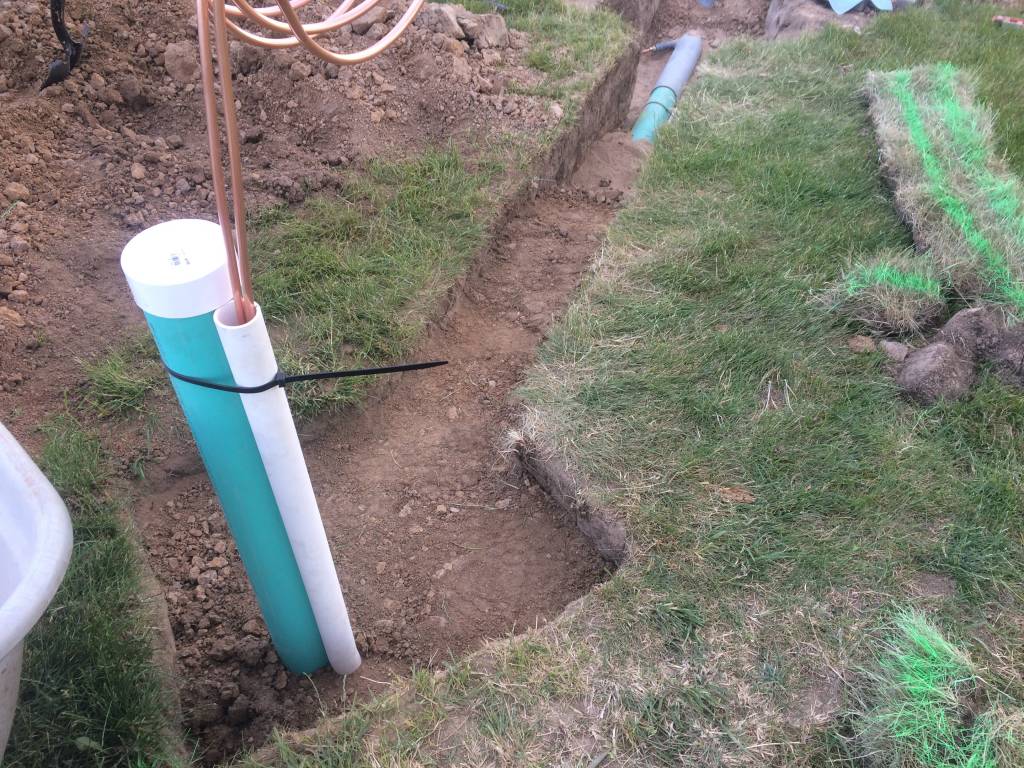
The white pipe strapped to the side if for running the copper gas lines underground.. It serves two functions. 1 is to protect the lines as best as it can. and 2, if they do fail in the future, I won't have to dig up the trench again. I'll only have to dig a hole in the pit end down to the pipe to replace them. The gradual curve in the pipe allow for the copper tubing the be pushed down inside of the pipe until it comes out the other end.
That curve was put into the PVC pipe by carefully heating it and using an old tire for the form. Once it was heated up enough and soft enough to bend, It was held against a tire until it cooled off and retained the shape.
The blueish green pipe is obviously for the air supply. On top of it i'll be mounting the blower. It is designed to be removable when not in use. Here is how it will mount on the pipe.
A close up of the other end.
Once everything was in place it was just a matter of filling it all back in.
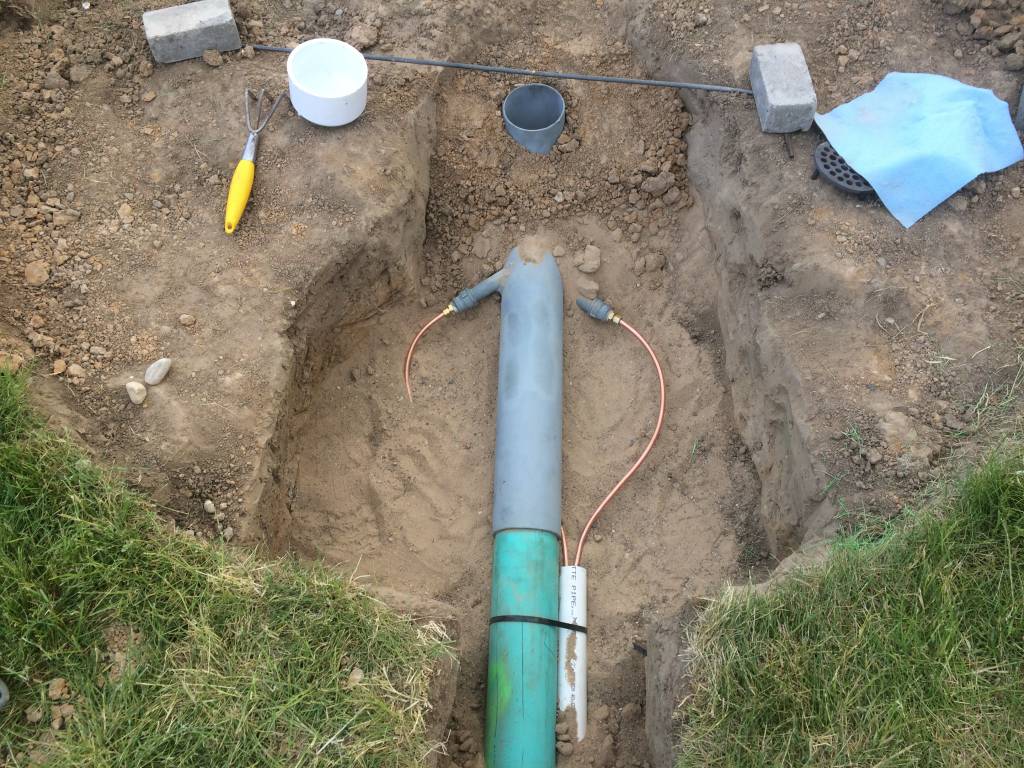
Gas lines comfortably routed and connected. Make sure there were now kinks or hard bends.
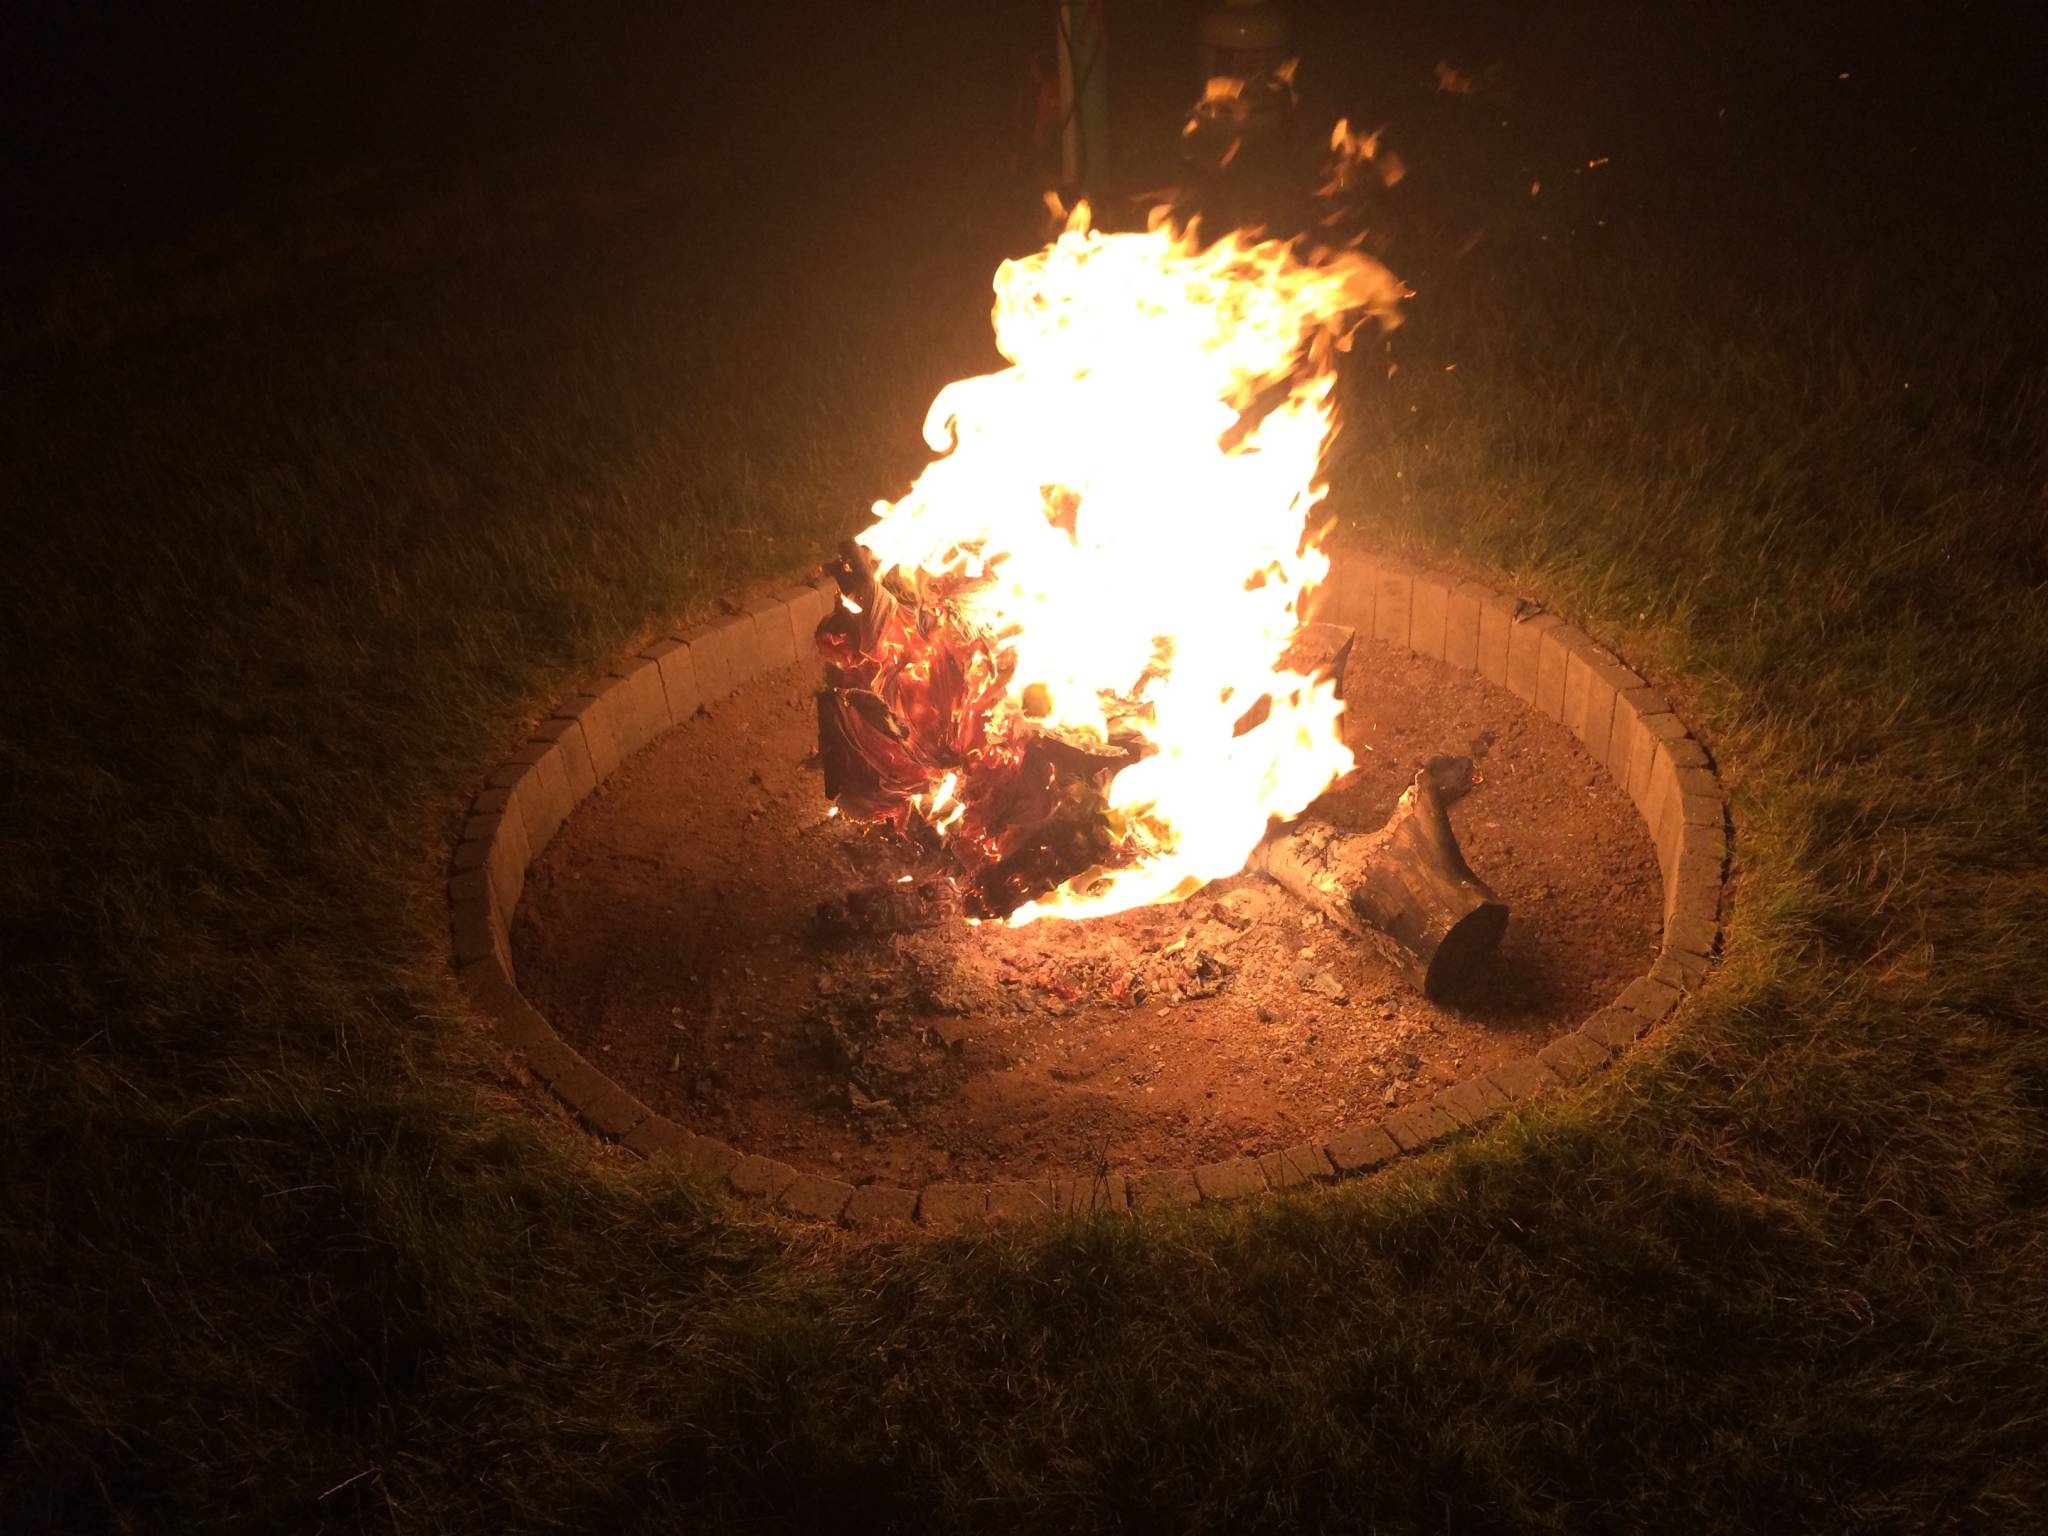
Everything filled in and about ready for a test fire. Only thing left was to line the edge with brick to finish it off.
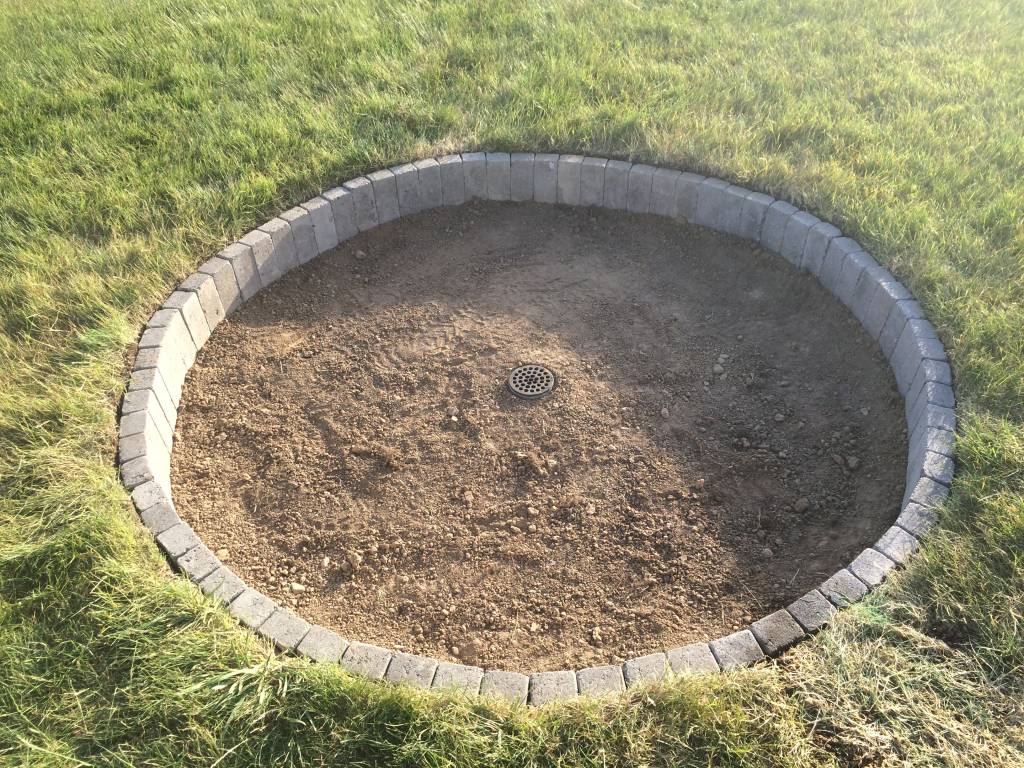
And the completed install. I'll add some videos later of it working.