
IOS Game Controller
Non-jailbroken even
This started back in around 2008 when I was working for a company named Access Programming Group. I got them to join the Apple MFI program and we decided it would be cool to make a game controller for the iPhone. You may ask why, but you have to remember, this is back when the iPhone was still pretty new and the accessories didn't exist back then.
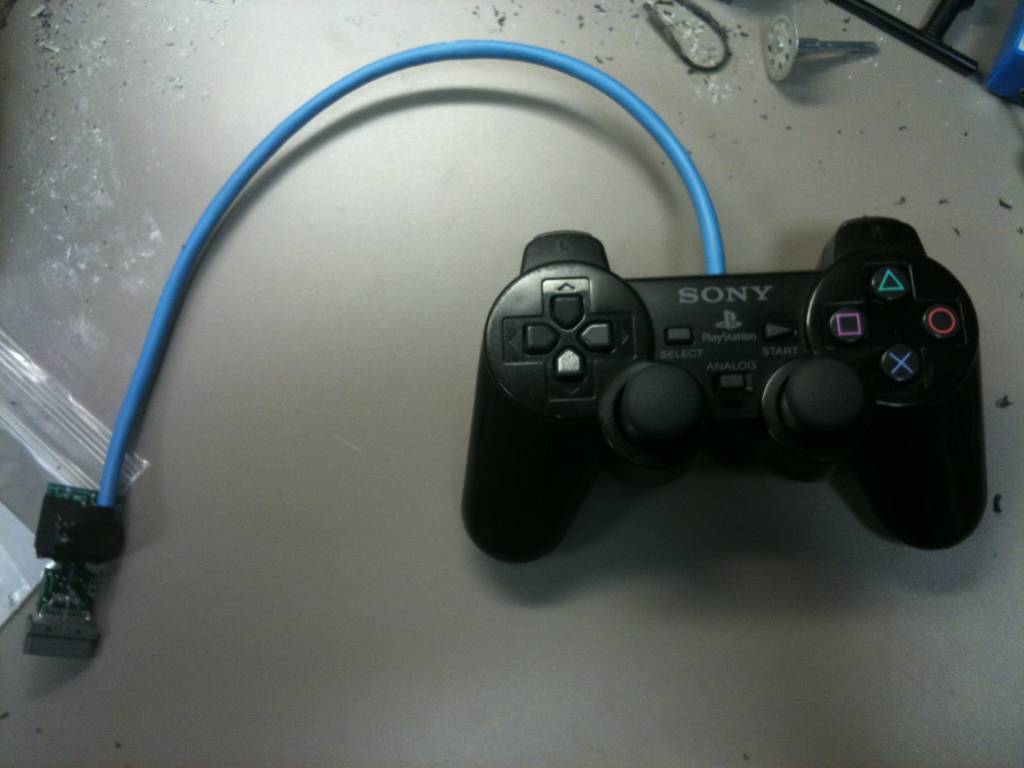
We started out with a standard PlayStation 1 controller but it was pretty beat up, so we went to the store and bought a used PlayStation 2 controller. I will admit, when I first was pinning it out, I totally forgot that unlike the PlayStation 1 controller, the PlayStation 2 controller is full analog input. It took a bit to completely remove the existing circuit board and pin out all the wires needed to connect to the buttons.
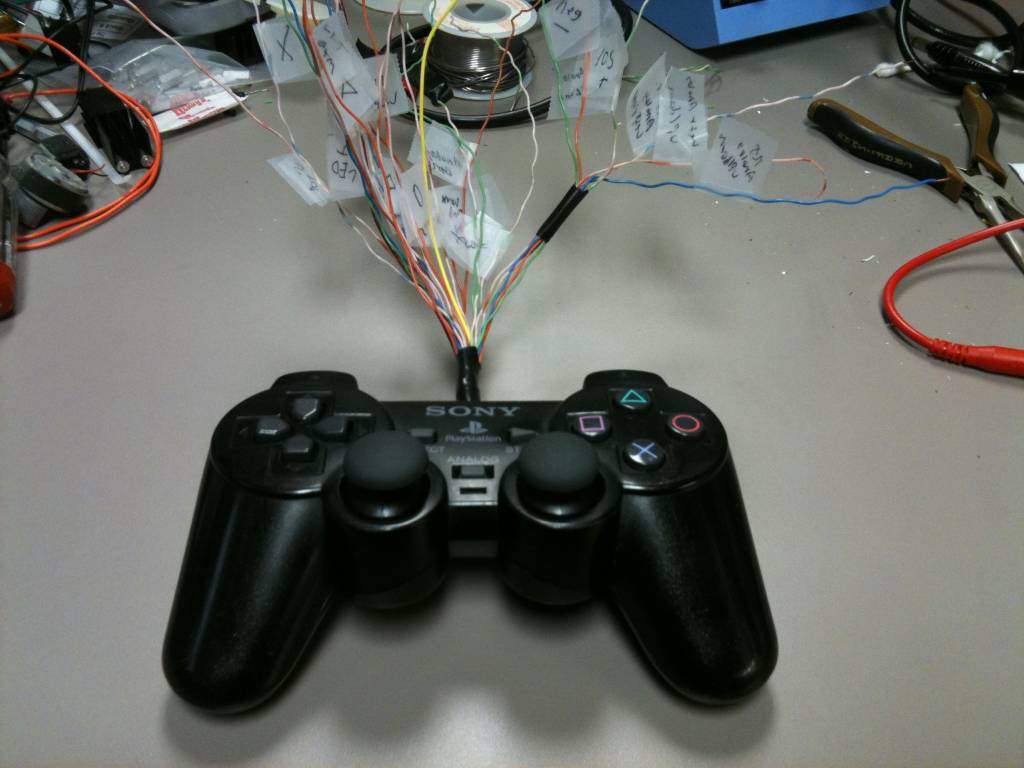
After some bench top breadboard testing, I finally mapped out all the buttons and figured out what I needed to do to make it work. Next step was to figure out what hardware I was going to use and make a circuit board.
Here is one of the first test fits that was done. It fit about perfectly but was quite right yet.
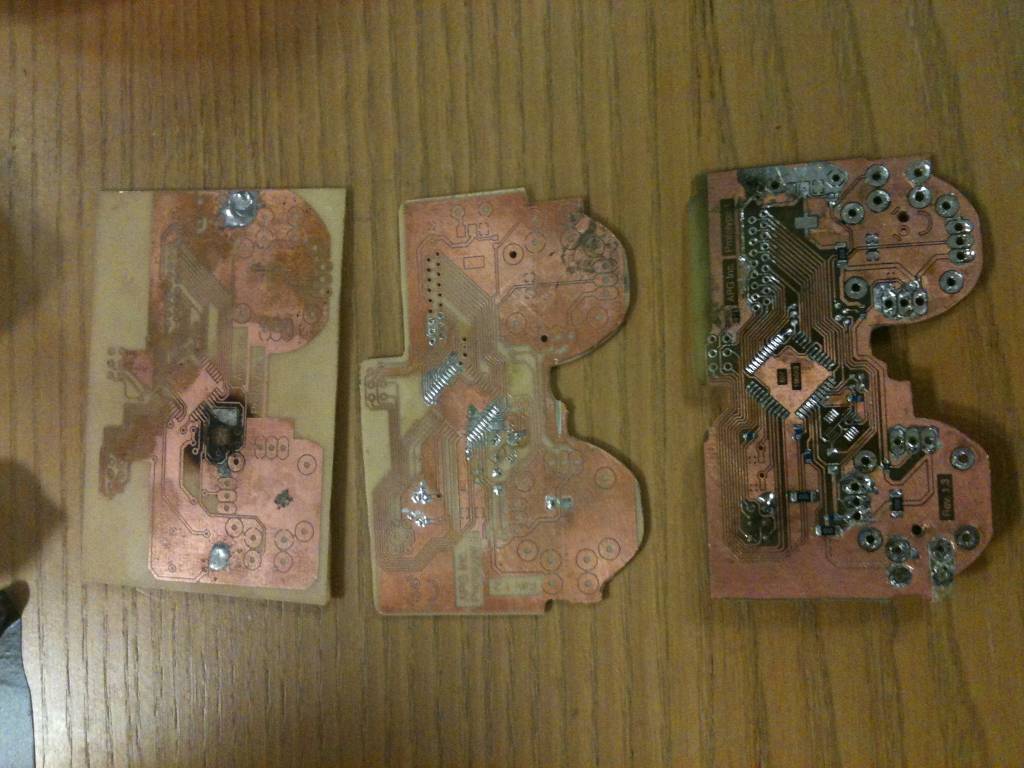
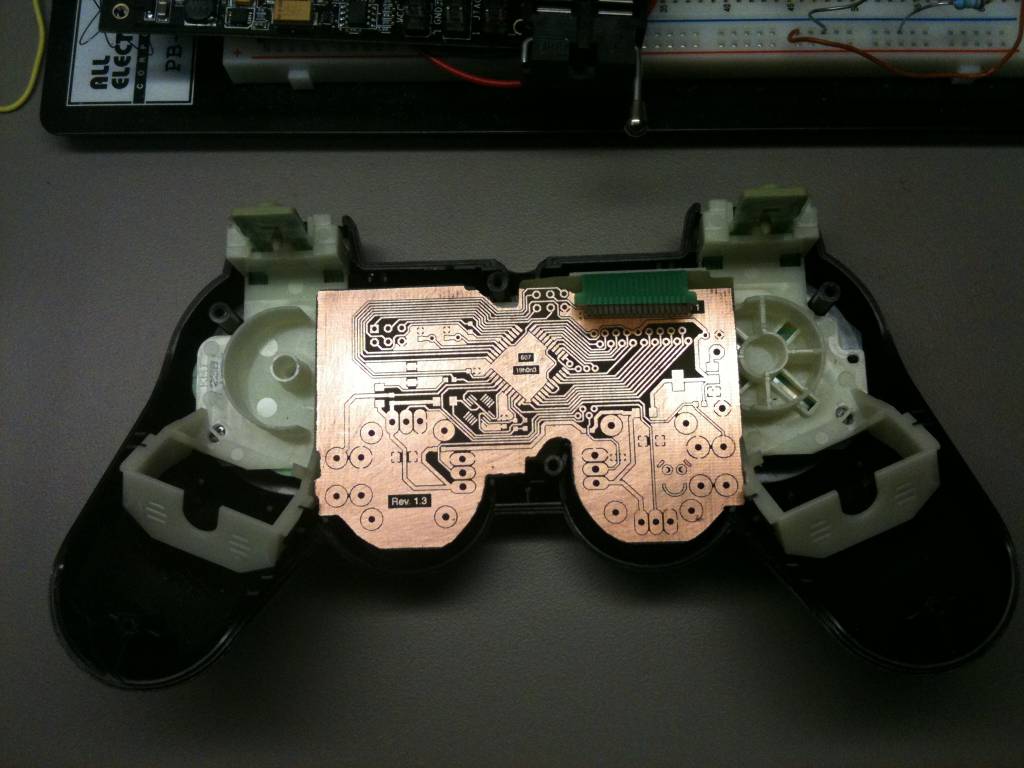
It went thru several revisions before creating a board that fit perfectly in the controller body. Etching a new boards took more time then soldering it seemed.
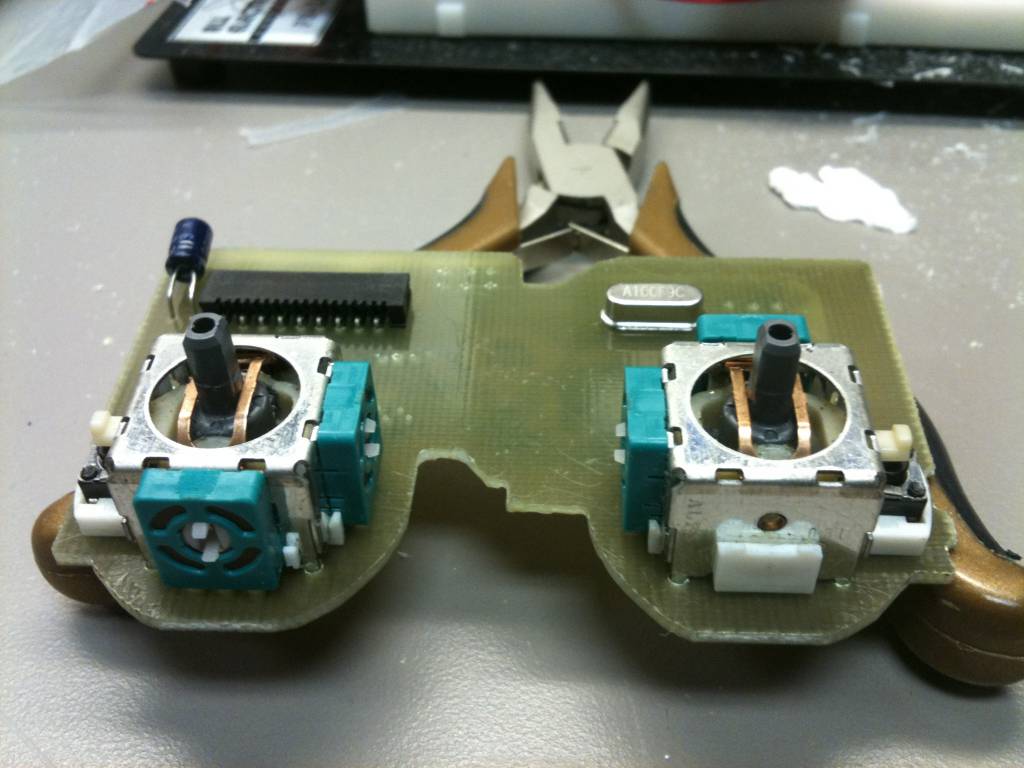
Using the components from the PlayStation controller, The hardest part was drilling the holes for the joystick in just the right spot so when it was all inserted into the controller body that they lined up perfectly center in the holes. If they were off just a bit they would rub on the side of the case and stick.
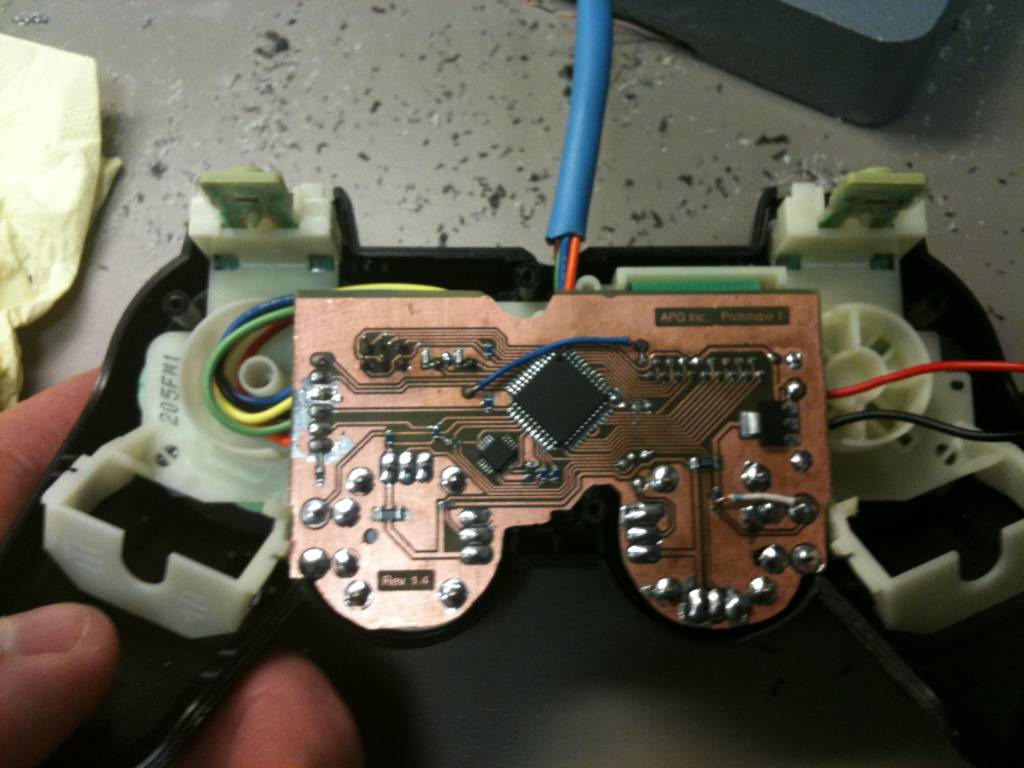
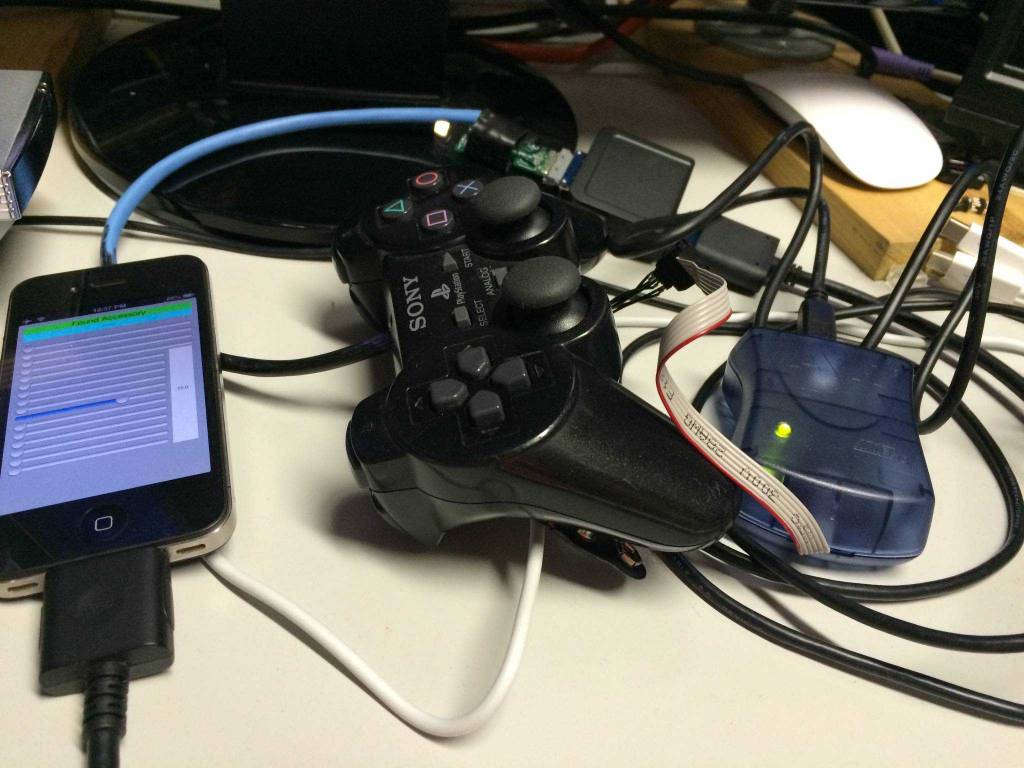
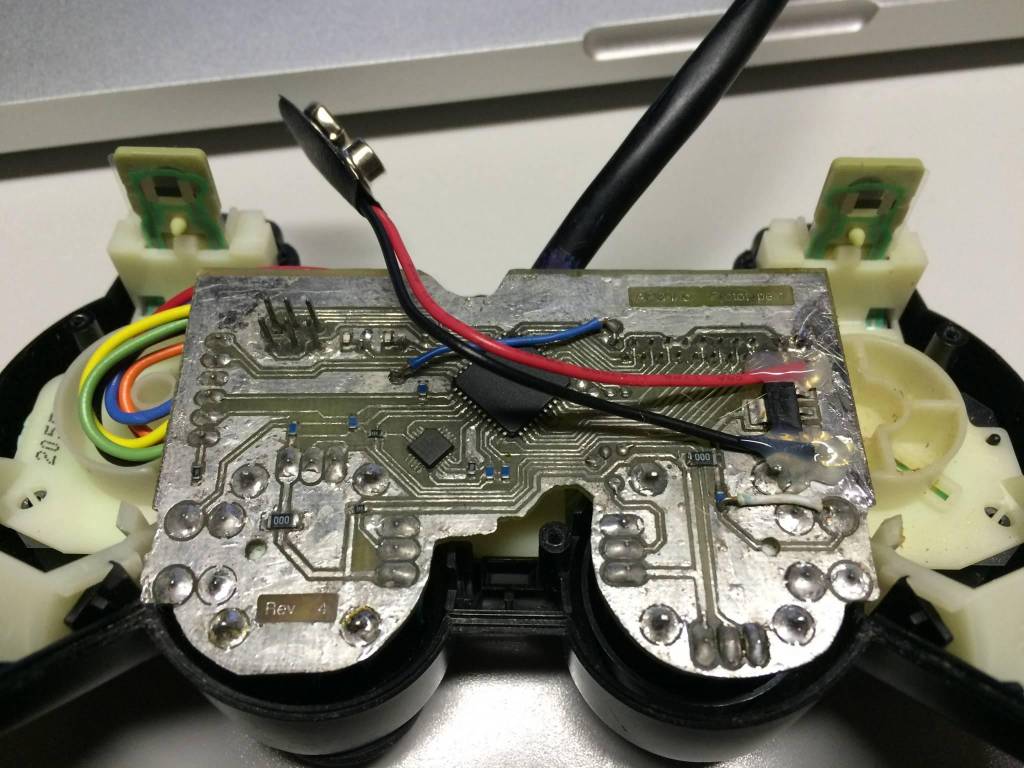
Here was the final revision of the board. Still had one design flaw, and that's where the white wire is. Just so happened to run a trace right where i needed to make a hole for a joystick alignment pin. Whoops. Oh well, easy fix. All the PlayStation buttons connect to the circuit board thru the green flat flex ribbon cable on the top. I added a 5v voltage regulator in there as I didn't know at the time if the iPhone was going to be able to power it. Turns out, it was. But it does add a nice secondary power source if i need to flash the chip and not have it connected to the phone.
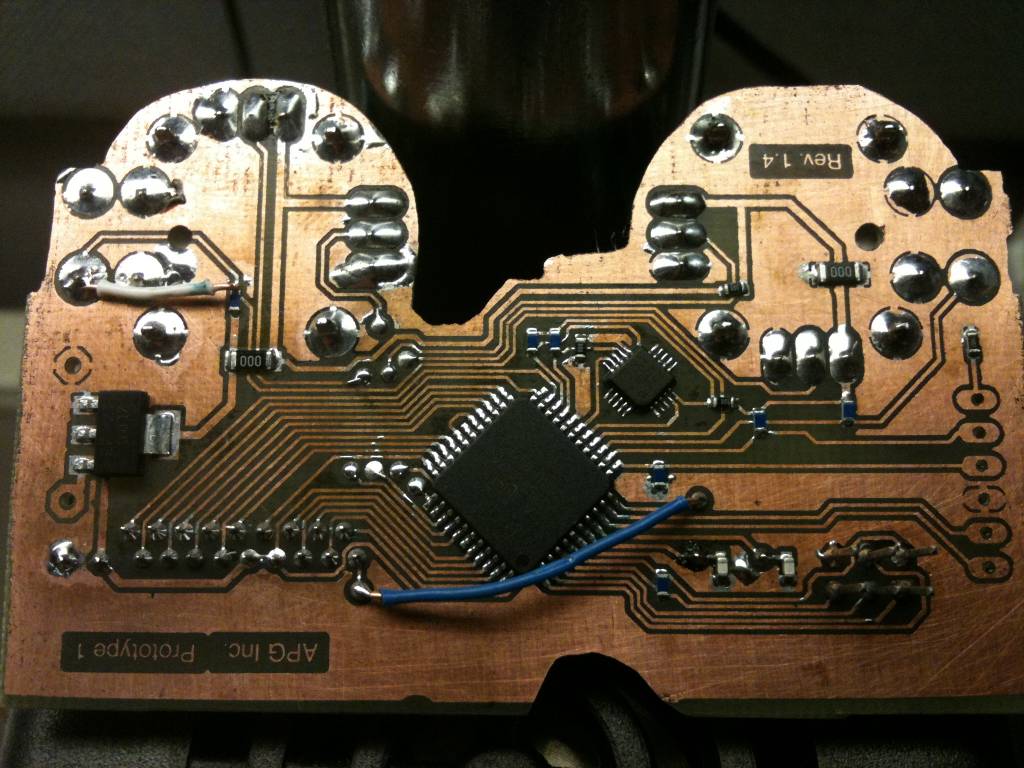
Here's a closeup of the board. Its sporting an Atmel AVR 644p Microcontroller. The little chips seen is apples magic chip. That POS is whats needed to make it work on non-jailbroken devices. I doubt I can go much into detail about it even thought it been 12 years working on it, but needless to say, that's what makes it work.
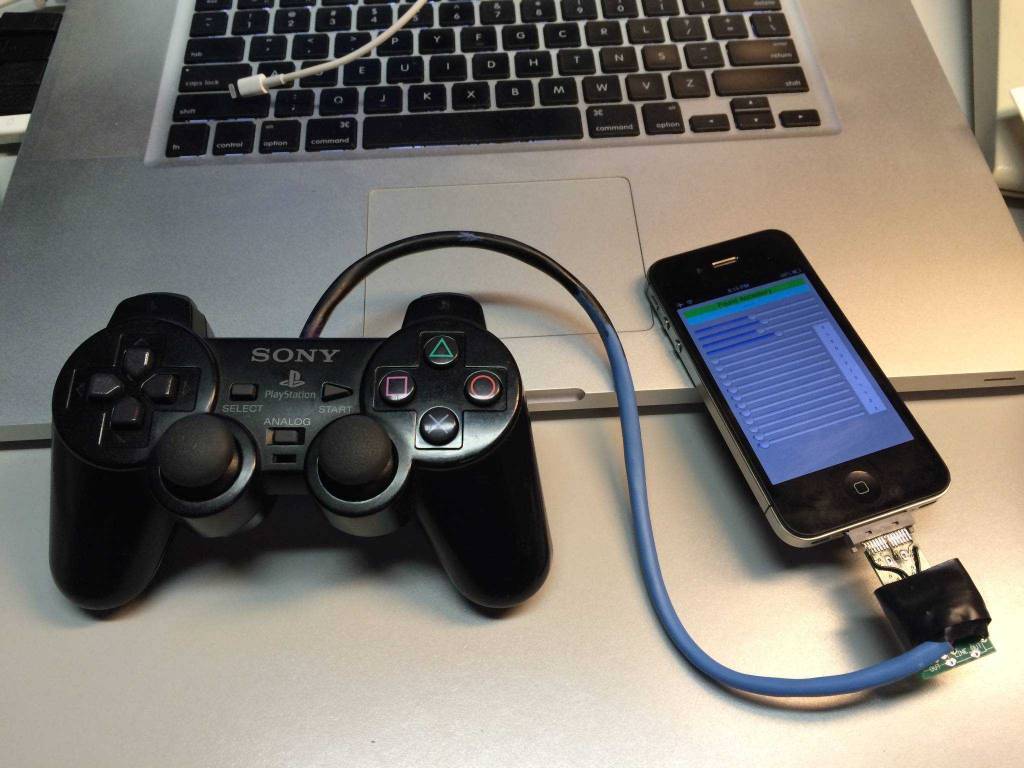
After it was finally assembled, Firmware had to be loaded onto the controller and a test app for the phone had to be written. Yes that's an iPhone 4, and I still have it to this day for testing things. The mobile app consisted of a bunch of sliders that would slide over a distance. That distance was determined by how hard you were pressing on the buttons. Yes this is a full analog controller as stated above so every button had a slider. Including the joysticks.
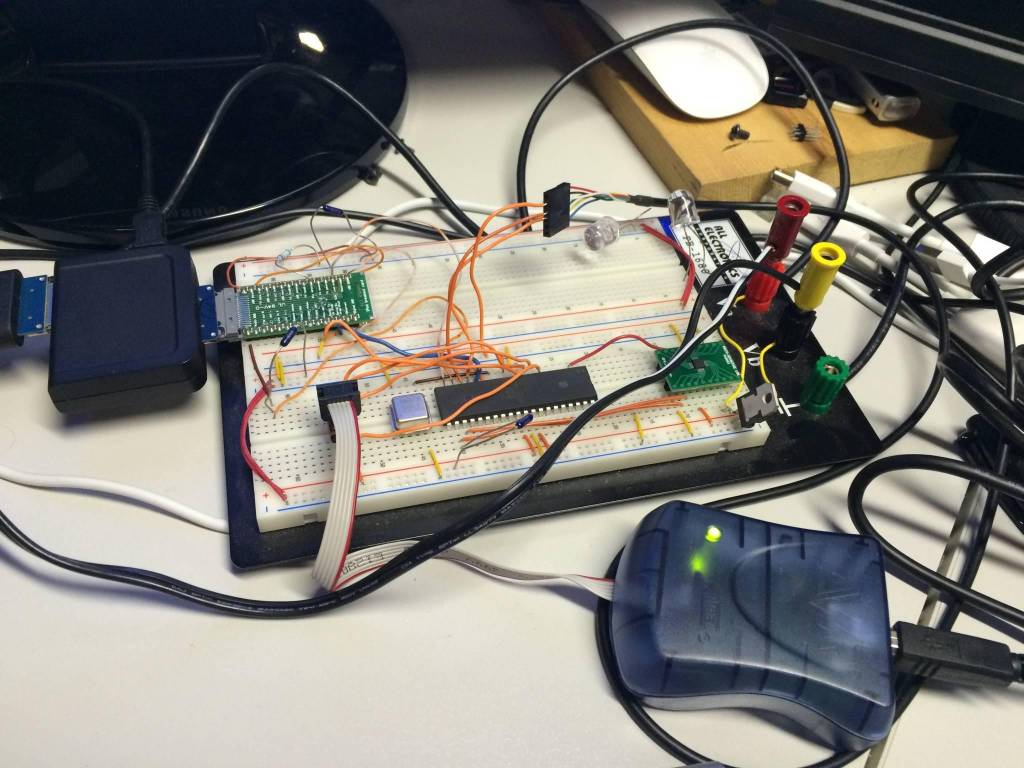
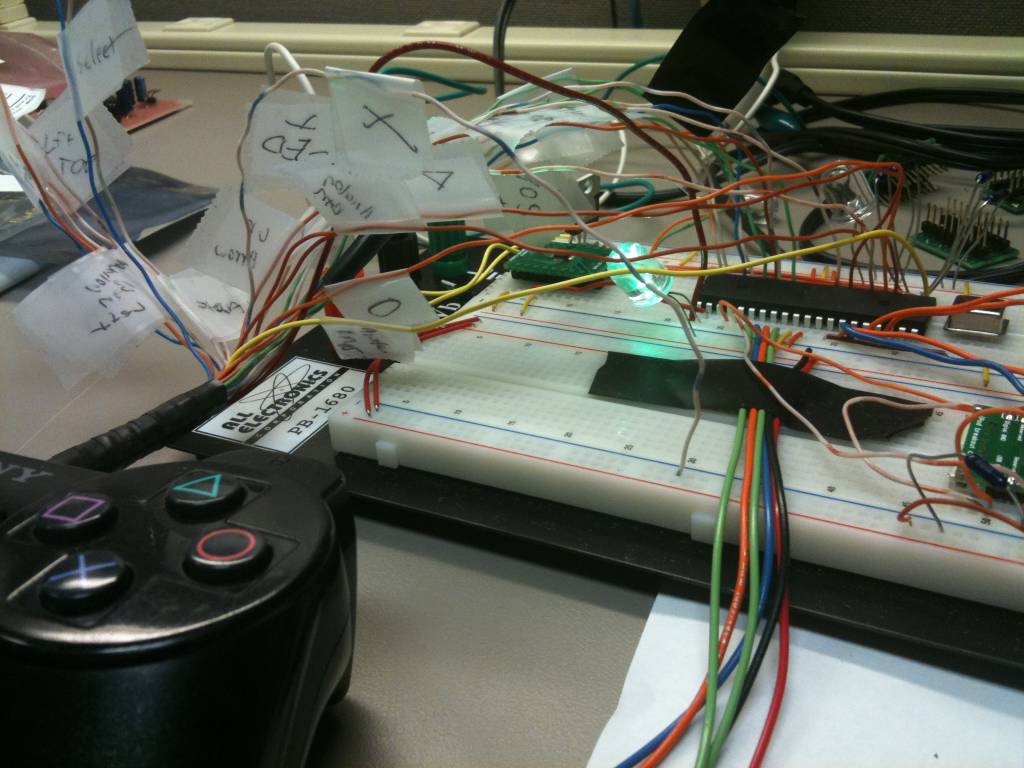
This is the test board I setup to write the firmware for the controller on. I could connect the Microcontroller to the phone with the adapter in the upper left corner. The little back box there is another Apple testing unit that would allow me to see the traffic between my accessory and the phone to make sure I was giving the phone what it expected to see.
More recently I pulled the unit apart and tinned the entire copper traces as they were starting to corrode. I also revisited the firmware to update it to work on iOS 7 since i had not touched it of iOS5. Also played around with making it work on my iPhone 5s at the time thru a 30 to lighting adapter. I did have some limited success with it.
It once again works on the iPhone 4 with the firmware update. The only thing I wish I did was buy more of those 30 pin dock connectors back in the day. The end i have on there has been banged up pretty good and I don't have any replacements anymore. I can't even find new old stock. If anyone knows of where could get some, let me know. They have to have all 30 pins in them so cutting them out of an old charge cable will not work. I need other pins these cables don't have.